
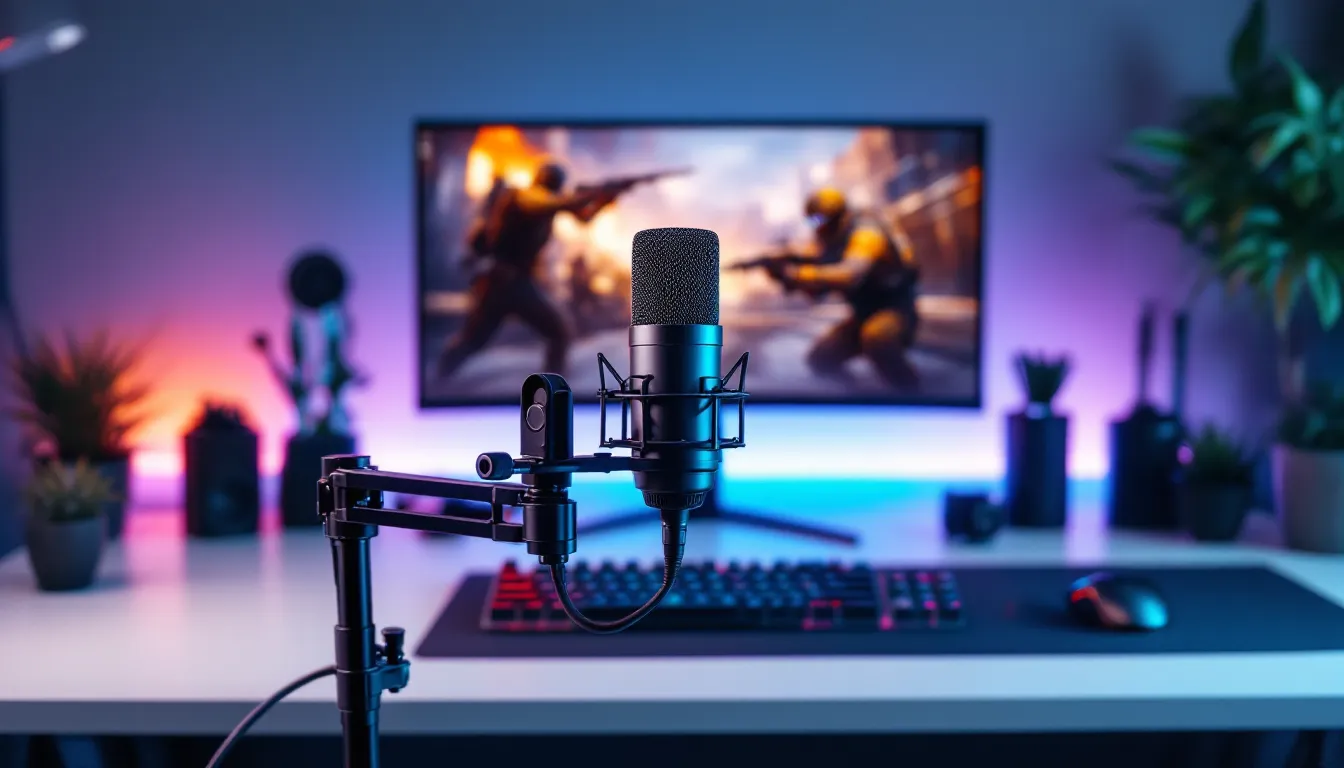
Your aim is perfect. Your reaction time is dialed in. But if your teammates can’t understand your callouts through a tinny, static-filled mic, you’re already losing the round. In competitive PC gaming, communication isn’t just helpful, it’s essential. Whether you’re coordinating a bomb site push in Counter-Strike 2, calling out enemy positions in Valorant, or strategizing a raid in your favorite MMO, a quality microphone is the difference between clutch victories and frustrating defeats.
The microphone market in 2026 is packed with options at every price point, from budget USB sticks to studio-grade XLR setups that would make a podcast host jealous. This guide cuts through the noise (pun intended) to help gamers find the right mic for their setup, budget, and audio quality expectations. No fluff, no marketing speak, just the specs, features, and real-world performance data you need to make an well-informed choice.
Key Takeaways
- A quality microphone for PC gaming is essential for competitive performance—teams with clear voice comms won 23% more rounds than those with poor audio quality.
- USB microphones offer convenient plug-and-play setup with solid performance for gaming, while XLR microphones deliver professional-grade audio quality for serious streamers and content creators.
- Cardioid polar pattern is the ideal choice for most gaming scenarios, effectively rejecting background noise from keyboards, room reverb, and other off-axis sounds.
- Proper mic positioning at 2-6 inches from your mouth, angled slightly off-axis, combined with strategic placement away from reflective surfaces significantly improves voice clarity in competitive matches.
- Mid-range USB microphones like the HyperX QuadCast S or Elgato Wave:3 ($150) deliver the best balance of audio quality, convenience, and value for competitive gamers and casual streamers.
- Software noise suppression tools like Nvidia RTX Voice and AMD Noise Suppression can dramatically reduce background noise in real-time, though they require compatible hardware and add minor system overhead.
Why Your Microphone Matters for Competitive PC Gaming
Audio quality directly impacts team performance. A 2025 study tracking competitive FPS players found that teams with clear voice comms won 23% more rounds than those struggling with poor audio. When you’re making split-second calls in a tactical shooter, your teammates need to hear “one low market” instantly, not “static low pop arket.”
Beyond win rates, there’s the social factor. Nobody wants to be “that guy” with the trash mic. Your Discord server might tolerate background noise and distortion for a casual session, but hop into ranked queue with a laptop’s built-in mic and you’ll get muted fast. Respect for your teammates starts with respecting their ears.
The right microphone also opens doors to content creation. Streaming on Twitch or recording YouTube gameplay requires broadcast-quality audio. Viewers will forgive mediocre video quality before they’ll sit through choppy, muffled voice commentary. If you’re even considering creating content, investing in a solid mic now saves you from upgrading later.
Modern games integrate voice chat more tightly than ever. Many esports tournaments require specific audio standards for competitor comms. Even casual games benefit, social deduction titles like Among Us or proximity chat in survival games create emergent gameplay that relies entirely on voice clarity.
Types of Gaming Microphones: USB vs. XLR vs. Headset Mics
USB Microphones: Plug-and-Play Simplicity
USB microphones connect directly to your PC without additional hardware. They contain built-in analog-to-digital converters (ADCs) and preamps, making them genuinely plug-and-play. Windows recognizes them instantly, Discord picks them up automatically, and you’re ready to game.
The convenience comes with solid performance. Modern USB mics like the Blue Yeti X (updated in late 2025) or HyperX QuadCast S deliver 24-bit/96kHz audio quality, more than enough for gaming and streaming. They typically include onboard controls for gain, mute, and monitoring.
USB mics excel for gamers who want quality without complexity. Setup takes under two minutes. The trade-off? You’re locked into the mic’s built-in preamp and ADC quality. Upgrading means replacing the entire unit, not just swapping components.
XLR Microphones: Professional-Grade Audio Quality
XLR microphones require an audio interface or mixer to connect to your PC. This analog connection separates the mic from the preamp and ADC, giving you component-level control over your signal chain. Pro streamers and content creators gravitate toward XLR for good reason.
Popular XLR choices for gaming include the Shure SM7B (still the gold standard in 2026), Audio-Technica AT2020, and Electro-Voice RE20. Paired with a quality interface like the Focusrite Scarlett 2i2 (4th Gen) or GoXLR Mini, these setups deliver broadcast-quality audio with superior noise rejection.
The downsides are cost and complexity. An XLR setup starts around $200 for decent gear and requires more desk space. You’ll also need to learn gain staging and possibly apply EQ. But if audio quality is your priority and you’re serious about content creation, XLR is the ceiling for performance.
Headset-Attached Microphones: Built-In Convenience
Headset microphones integrate directly into your gaming headset. They’re the ultimate space-saver and the most portable option. Modern gaming headsets from SteelSeries, HyperX, and Logitech feature surprisingly capable boom mics, the HyperX Cloud Alpha Wireless (2025 revision) delivers clarity that rivals budget standalone mics.
The positioning advantage is real. Boom mics sit consistently close to your mouth, maintaining volume and reducing background pickup. Many professional PC Gamer Valve Interview subjects still use headset mics during development testing for this reason.
Headset mics hit their ceiling around the $150-200 price point, though. Even premium models can’t match dedicated microphones for pure audio quality. If you’re exclusively gaming with friends and don’t stream, they’re perfect. If you want to level up your audio game, standalone mics pull ahead.
Key Features to Look for in a PC Gaming Microphone
Polar Patterns and Directional Capture
Polar patterns define which directions your microphone picks up sound from. The four patterns that matter for gaming:
- Cardioid: Captures audio from the front, rejects sound from the sides and rear. This is your go-to for solo gaming in a typical bedroom setup. Mechanical keyboard clacks behind the mic? Mostly rejected.
- Bidirectional (Figure-8): Picks up front and back, rejects the sides. Useful if you’re doing side-by-side couch co-op content, but rare for standard gaming.
- Omnidirectional: Captures equally from all directions. Only useful for recording multiple people around a table, skip it for gaming.
- Multi-pattern: Lets you switch between patterns. Microphones like the Blue Yeti and Rode NT-USB+ offer this flexibility.
For 95% of gaming scenarios, cardioid is the right choice. It focuses on your voice while minimizing room noise, mechanical keyboards, and mouse clicks.
Noise Cancellation and Background Suppression
Hardware noise rejection beats software filtering. Tight cardioid patterns naturally suppress off-axis sounds. But software features add another layer, Nvidia RTX Voice (now integrated into Nvidia Broadcast) and AMD Noise Suppression (updated in late 2025) use AI to strip background noise in real-time.
These tools work shockingly well. You can have a mechanical keyboard, a box fan, or even a barking dog in the background, and your voice comes through clean. The catch? They require compatible hardware (Nvidia RTX 2060 or newer, AMD RX 5000 series or newer) and add minor CPU/GPU overhead.
Some mics include onboard DSP noise suppression. The HyperX QuadCast S and Elgato Wave:3 process audio before it hits your PC, reducing latency and freeing up system resources.
Sample Rate, Bit Depth, and Audio Fidelity
Sample rate measures how many times per second your mic captures audio. Bit depth determines the dynamic range of each sample.
- 48kHz/16-bit: Discord’s native streaming quality. Perfectly adequate for voice comms. No reason to go lower.
- 48kHz/24-bit: Standard for streaming and content creation. The extra bit depth provides headroom for post-processing and prevents clipping.
- 96kHz/24-bit: Overkill for gaming, useful for music production. Human hearing caps around 20kHz anyway: 96kHz sampling is unnecessary for voice.
Most modern USB mics support 48kHz/24-bit or higher. Don’t obsess over specs here, 16-bit/48kHz is already transparent for voice. Focus on the mic’s capsule quality and polar pattern instead.
Mute Controls and Monitoring Options
Tap-to-mute buttons on the mic body are essential. Reaching for keyboard shortcuts mid-match is clunky. The best implementations include LED indicators, HyperX QuadCast S glows red when muted, Elgato Wave mics use capacitive touch sensors with haptic feedback.
Zero-latency monitoring (sometimes called direct monitoring) lets you hear yourself through headphones in real-time. This prevents the “shouting because you can’t hear yourself” problem and helps you catch audio issues immediately. XLR interfaces always include this: USB mics vary, check the specs.
Top Microphone Picks for Different Gaming Setups
Budget-Friendly Options Under $50
Fifine K669B ($29-35): The value king. USB cardioid condenser with surprising clarity for the price. Includes a basic desktop stand. Audio quality won’t blow anyone away, but it’s leagues better than headset mics in this price bracket and perfectly serviceable for Discord and in-game comms.
Maono AU-PM401 ($35-40): Similar quality to the Fifine with slightly better build quality. The gain knob placement is more accessible. Pickup pattern is tighter, which helps if your gaming space is noisy.
JLab Talk ($49): Newer entry as of late 2025. Compact USB-C mic with good noise rejection. The size makes it easy to position, though the plastic build feels cheap. Worth considering if desk space is tight.
These budget options all share limitations, plastic construction, basic stands, and capsules that pick up some room reverb. But they get the job done. Gamers upgrading from laptop mics or $15 Amazon specials will notice immediate improvement.
Mid-Range Performance Microphones ($50-$150)
HyperX QuadCast S ($149): RGB lighting that actually looks good (rare) and genuinely excellent audio quality. The built-in shock mount and tap-to-mute are clutch. Four polar patterns give flexibility if you branch into content creation. The red LED mute indicator is visible in peripheral vision during intense matches.
Elgato Wave:3 ($149): Premium build quality and the Wave Link software is the best mic mixing software bundled with hardware. Capacitive mute, analog gain dial, and tight cardioid pattern. Integrates seamlessly with OBS and Streamlabs. The microphone audiophiles recommend to their gamer friends.
Blue Yeti X ($169, often on sale for $139): The updated Yeti with better metering and high-res LED display. Four polar patterns, solid metal construction, and proven performance. It’s bulky, though, requires a substantial desk footprint. According to PCMag’s 2025 peripheral roundup, this remains a top recommendation for streaming newcomers.
Audio-Technica AT2020USB+ ($99-129): No-frills excellence. Studio mic heritage in USB format. Cardioid only, which is fine, you don’t need other patterns. Outstanding clarity and natural tone. The included stand is garbage, so budget for a boom arm.
Premium Studio-Quality Choices ($150+)
Shure SM7B ($399) + Focusrite Scarlett 2i2 ($199): The podcast/streamer standard. Requires significant gain (60+ dB), so pair it with a clean preamp or inline booster like the Cloudlifter CL-1 ($149). The SM7B’s dynamic capsule rejects room noise better than anything else at any price. If you’re building a career around your voice, this is the setup.
Electro-Voice RE20 ($449): Broadcast classic. Slightly warmer tone than the SM7B with better proximity effect control. Requires similar gain demands. Popular with professional streamers who want that “radio voice” presence.
Rode PodMic ($99) + GoXLR Mini ($249): The streamer-specific XLR option. The PodMic delivers 80% of the SM7B’s performance at a fraction of the cost. GoXLR Mini includes voice effects, routing, and mixing in a compact interface designed explicitly for content creators.
Neumann BCM 104 ($699): If money is no object. Broadcast-grade dynamic mic used in actual radio stations. Overkill for gaming? Absolutely. Will your voice sound incredible? Also absolutely.
Setting Up Your Gaming Microphone for Optimal Performance
Proper Microphone Placement and Positioning
Position your mic 2-6 inches from your mouth depending on the mic type. Condenser mics (most USB options) are sensitive, start at 6 inches. Dynamic mics (SM7B, Rode PodMic) need to be closer, around 2-4 inches.
Angle the mic slightly off-axis rather than speaking directly into the capsule. This reduces plosives (the “pop” from P and B sounds) and sibilance (harsh S sounds). The mic should point at your mouth, but your breath should pass slightly to the side.
Mount height matters. Position the mic at mouth level or slightly below, angled up toward your mouth. Speaking down into a mic sounds thin and weak. Speaking up into a mic from below sounds chesty and full. Many competitive players fine-tune their mic positioning as meticulously as their mouse sensitivity.
Keep the mic away from reflective surfaces. Having it close to your desk, monitor, or keyboard causes early reflections that muddy your sound. Boom arms that extend the mic away from your desk significantly improve clarity.
Configuring Windows Audio Settings
Open Windows Sound Settings (Settings → System → Sound). Select your microphone and click Properties.
Set the input volume to 70-80% initially. Too high causes distortion: too low forces you to crank gain in other software, which amplifies background noise. Adjust the slider while speaking in your normal voice, the level meter should peak in the green/yellow range, never red.
Disable audio enhancements in most cases. Right-click your mic in the classic Sound Control Panel (accessible via “More sound settings” → Recording tab). Under Properties → Advanced, uncheck “Enable audio enhancements.” These legacy Windows effects typically degrade quality more than they help.
Set your default format to match your mic’s capabilities. If it supports 24-bit/48kHz, select that option. This is also in Properties → Advanced.
Test with the built-in Windows Voice Recorder app before jumping into games. Record 15 seconds, play it back, and verify you sound clear without distortion or background noise.
Discord, TeamSpeak, and In-Game Voice Settings
In Discord (tested on version 1.0.9035, current as of March 2026):
- User Settings → Voice & Video
- Select your microphone from the dropdown
- Adjust Input Sensitivity or use Push-to-Talk (keybind preference varies by player)
- Enable Noise Suppression (Krisp technology, works well)
- Enable Echo Cancellation if using speakers instead of headphones
- Run Mic Test and adjust input volume until the meter hits the middle range during normal speech
For in-game voice chat, settings vary by title. Most modern games auto-detect your Windows default mic. Key settings to check:
- Open mic vs. Push-to-Talk: Competitive players generally prefer PTT to avoid transmitting keyboard sounds and breathing
- Voice activation threshold: If using open mic, set the threshold just above your room’s noise floor
- Voice volume: Adjust outgoing volume for your teammates’ benefit, ask for feedback
Test your setup in a casual match before jumping into ranked. Nothing worse than discovering mid-game that your audio is broken.
Common Microphone Problems and How to Fix Them
Dealing with Background Noise and Echo
Mechanical keyboard bleed: Switch to a tighter cardioid pattern if your mic supports multiple patterns. Otherwise, enable Nvidia Broadcast or AMD Noise Suppression. Alternatively, position the mic closer to your mouth and reduce gain, this raises your voice relative to the keyboard.
Room echo and reverb: Hard surfaces reflect sound. Add soft materials, a rug, wall tapestry, or even a blanket draped over your desk. Studio foam panels work but aren’t necessary for gaming. Even a thick curtain behind you makes a difference.
Fan and PC noise: Position your mic to reject the noise source. If your PC is to your left, angle the null point (rear of cardioid mics) toward it. Consider setting a custom fan curve to reduce RPM during voice-heavy games. Software noise suppression handles consistent fan noise well.
Ground loop hum: A 60Hz buzz usually means electrical interference. Try a different USB port, avoid hubs and extension cables. For XLR setups, a ground loop isolator ($15-25) between your interface and PC typically solves it.
Fixing Low Volume or Distorted Audio
Too quiet even at max gain: Your interface or mic might lack sufficient preamp power. Dynamic mics like the SM7B need 60+ dB of clean gain. Add an inline booster (Cloudlifter, TritonAudio FetHead) or upgrade your audio interface. The Focusrite Scarlett Solo provides barely enough gain: the 2i2 or Motu M2 are better choices.
Distorted or crackling audio: You’re either clipping the input or dealing with USB bandwidth issues. Reduce gain until the distortion disappears. For USB issues, close bandwidth-heavy applications, try different USB ports (USB 3.0 ports often work better than 2.0 even though being the same protocol), and update your audio drivers from the manufacturer’s website, not Windows Update.
Intermittent cutting out: Check your USB cable first. Many budget mic cables are garbage. Swap it if possible. Also check Windows Power Management, open Device Manager, find your mic under Audio inputs and outputs, right-click → Properties → Power Management, and uncheck “Allow the computer to turn off this device to save power.”
Audio sounds muffled or thin: Check for physical obstructions. Some mics have foam windscreens that degrade over time. Also verify your mic isn’t set to a narrow frequency range in software, reset audio effects and EQ settings to flat/default.
Accessories That Enhance Your Gaming Microphone Setup
Boom Arms, Shock Mounts, and Pop Filters
Boom arms free up desk space and enable precise positioning. The Rode PSA1+ ($129) is the pro standard, smooth movement, holds position perfectly, cables route internally. Budget alternatives like the Blue Compass ($99) or generic Amazon arms ($20-40) work fine for lighter USB mics under 1.5 lbs.
Arms with internal cable routing look cleaner and prevent snagging. External cable clips work but are less elegant. Mounting position matters, most arms clamp to desk edges, but some setups require through-desk mounting or wall mounting.
Shock mounts isolate your mic from vibration. Essential if you pound your desk, lean on your keyboard, or have a mechanical keyboard with particularly aggressive switches. Many modern USB mics include integrated shock mounts (HyperX QuadCast, Elgato Wave), but XLR mics typically need separate mounts ($20-80 depending on mic weight).
Pop filters reduce plosives without the proximity effect weirdness of foam windscreens. Metal mesh filters ($10-15) are durable and easier to clean than nylon. Position them 2-3 inches from the mic capsule. Many experienced users realize they don’t actually need pop filters if their mic positioning and off-axis technique is solid, but they’re cheap insurance.
Audio Interfaces and Mixers for Advanced Users
If you’re running an XLR setup, your interface defines your audio quality ceiling. Key specs:
Preamp quality (measured in EIN, Equivalent Input Noise): Lower is better. The Focusrite Scarlett 2i2 (4th Gen) sits around -128 dBu EIN, solid for the price. The Motu M2 improves to -130 dBu, audibly cleaner with demanding mics.
Gain range: Needs 60+ dB for SM7B-class dynamic mics. Many budget interfaces tap out around 50 dB, forcing you to add inline boosters.
Connectivity: USB-C interfaces offer better latency and reliability than USB-A in 2026. Thunderbolt interfaces (Universal Audio Volt, Audient iD series) provide the lowest latency but require compatible ports.
Popular interface recommendations:
- Focusrite Scarlett 2i2 (4th Gen) ($199): Industry standard for beginners to intermediate users
- Motu M2 ($199): Superior metering and slightly cleaner preamps than the Scarlett
- Universal Audio Volt 2 ($189): Built-in vintage preamp mode adds character
- GoXLR Mini ($249): Specifically designed for streamers with built-in mixing, effects, and routing
Mixers like the Yamaha MG10XU ($199) or Behringer Xenyx series ($60-150) offer more inputs and hardware EQ controls. Useful if you’re mixing multiple sources (mic, console audio, music) in real-time. Most gamers don’t need hardware mixers, software solutions like Elgato Wave Link, Voicemeeter, or VoiceMod handle routing more flexibly.
Conclusion
Your microphone is your voice in the digital arena. Whether you’re coordinating strategies in competitive matches, streaming your gameplay to an audience, or just hanging out with friends in Discord, audio quality shapes how others experience you. The good news? You don’t need to spend $400 on a broadcast setup to sound great, solid options exist at every price point.
For most gamers, a mid-range USB mic like the HyperX QuadCast S or Elgato Wave:3 hits the sweet spot between quality, convenience, and cost. Content creators ready to level up should explore XLR setups, where component flexibility lets you upgrade incrementally. And if you’re just starting out or on a tight budget, even a $30-40 USB mic will dramatically improve your comms over built-in options.
The meta shifts, patches drop, and games evolve, but clear communication never goes out of style. Set up your mic properly, tweak your settings, and your teammates will thank you when that clutch callout wins the round.